Impressions are a crucial piece in achieving beautiful and high quality restorations. We are here to share a few tips with you on how to check impressions before sending them to your dental laboratory. Doing this will help you save money, reduce turn around time and ensure you get a great quality product the first time around!
1. Occlusal Clearance Tabs
We recommend the use of occlusal clearance tabs to check the occlusal reduction of preps. Doing this will help to ensure there is enough occlusal clearance and that the doctor and laboratory are on the same page. Get your free set of occlusal clearance tabs here!
2. Light up the Impression
After taking the impression, hold it up to a bright light. While doing this if you can see light coming through then the prep has not been reduced enough. An ideal impression should have no transparencies.
(This is an example of a poorly taken bite with not enough prep reduction due to how much light is shining through.)
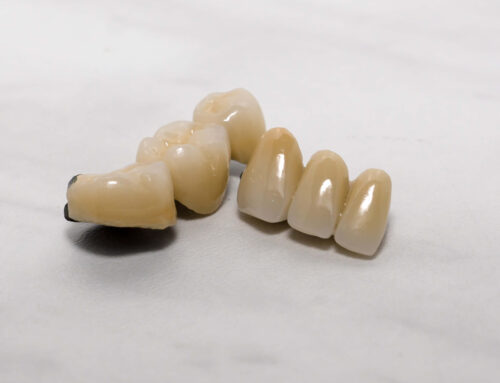
3. Check the Margins
Inspect all the margins, that they are complete, with clean and sharp edges. Be sure there are no voids, pulls, smears, tears or any odd looking areas.
(This is an ideal impression. The margins are clean, crisp and clear. The tray is not showing through. There is a proper amount of impression material.)
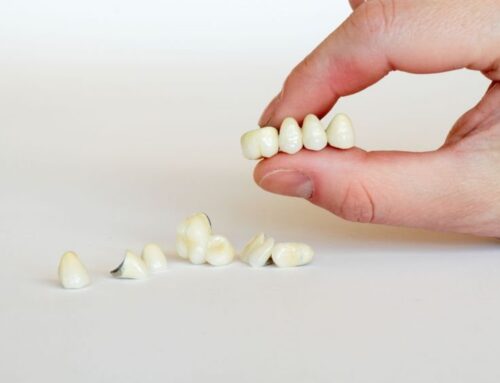
4. Avoid Contact
Try and avoid involvement with cotton rolls or any impact with the impression tray. These could distort the margins or make it hard to pour up an accurate model. The best solution is to take another impression while the patient is still in the chair and send both impressions in. Doing this will help ensure a better quality product for you and your patient.
(This impression is not good because the impression tray is showing through the material and is far to close to the margin.)